
Categories
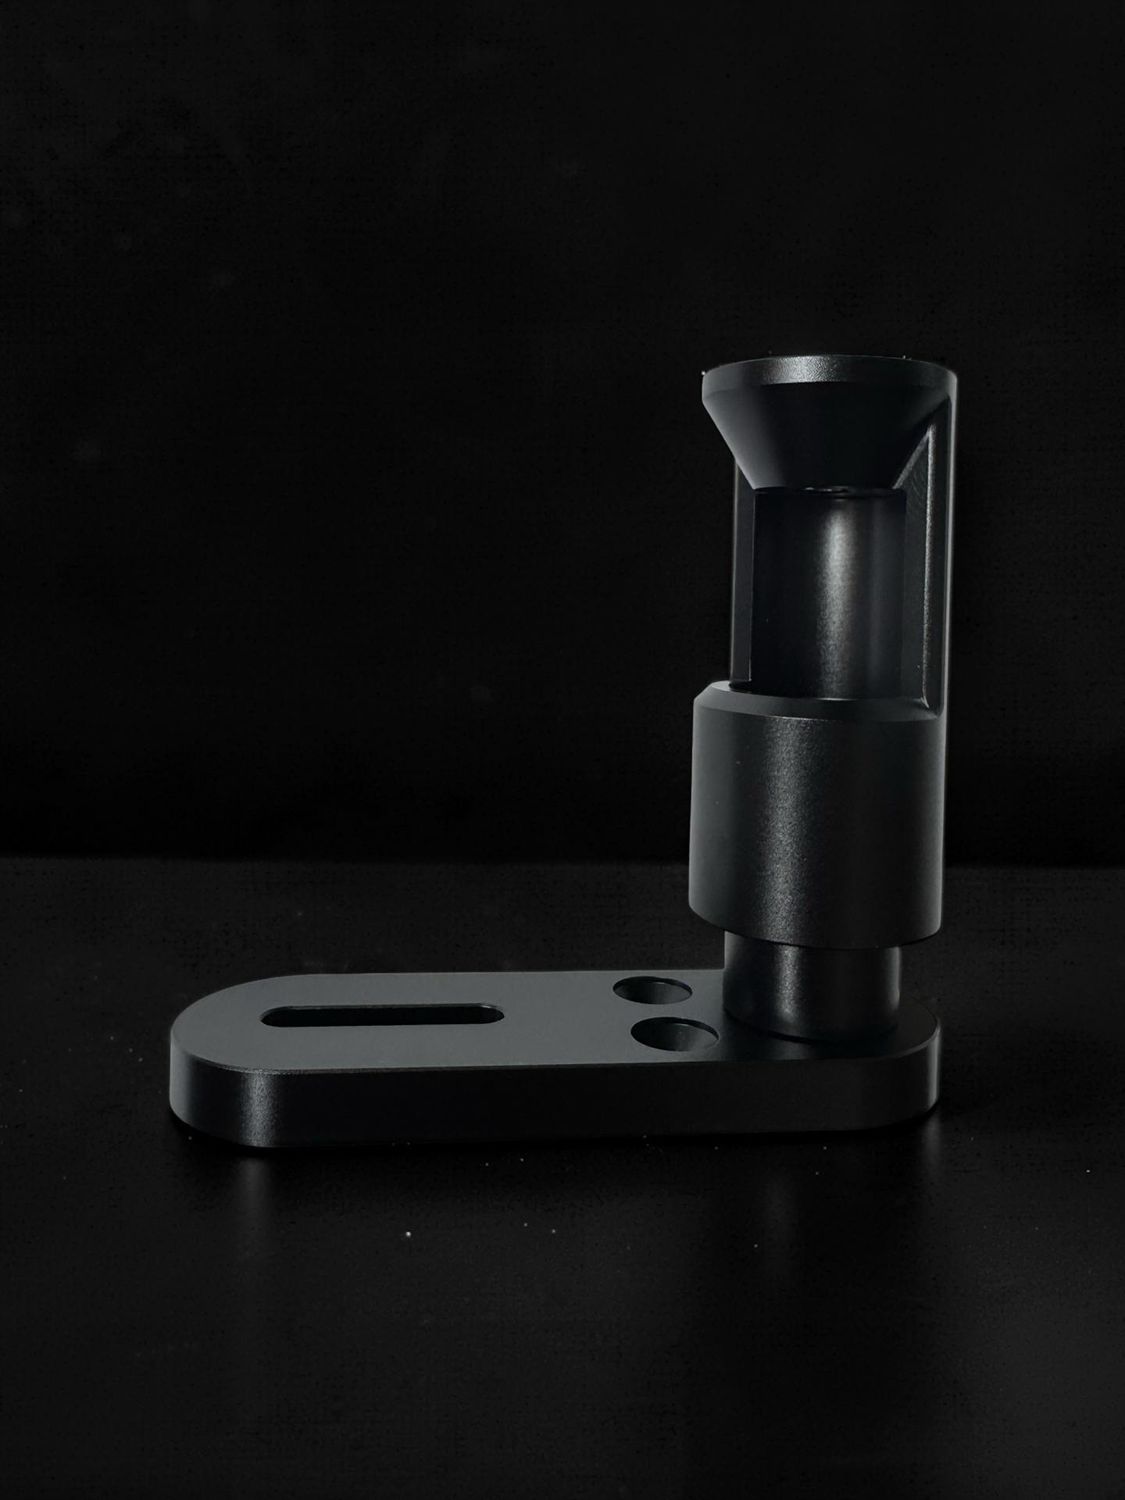
JURA Beading Tool Maker
SKU EQ.MG.BT
€ 61,00
Choose CombiDeal
1
Save this product for later
Have questions?
JURA Beading Tool Maker
Product Details
Weight: 0.20 kg
HS code 8466 20 · US HTS 8466.20.80.40
Micro Grinder attachment · Beading Tool Maker
JURA Beading Tool Maker
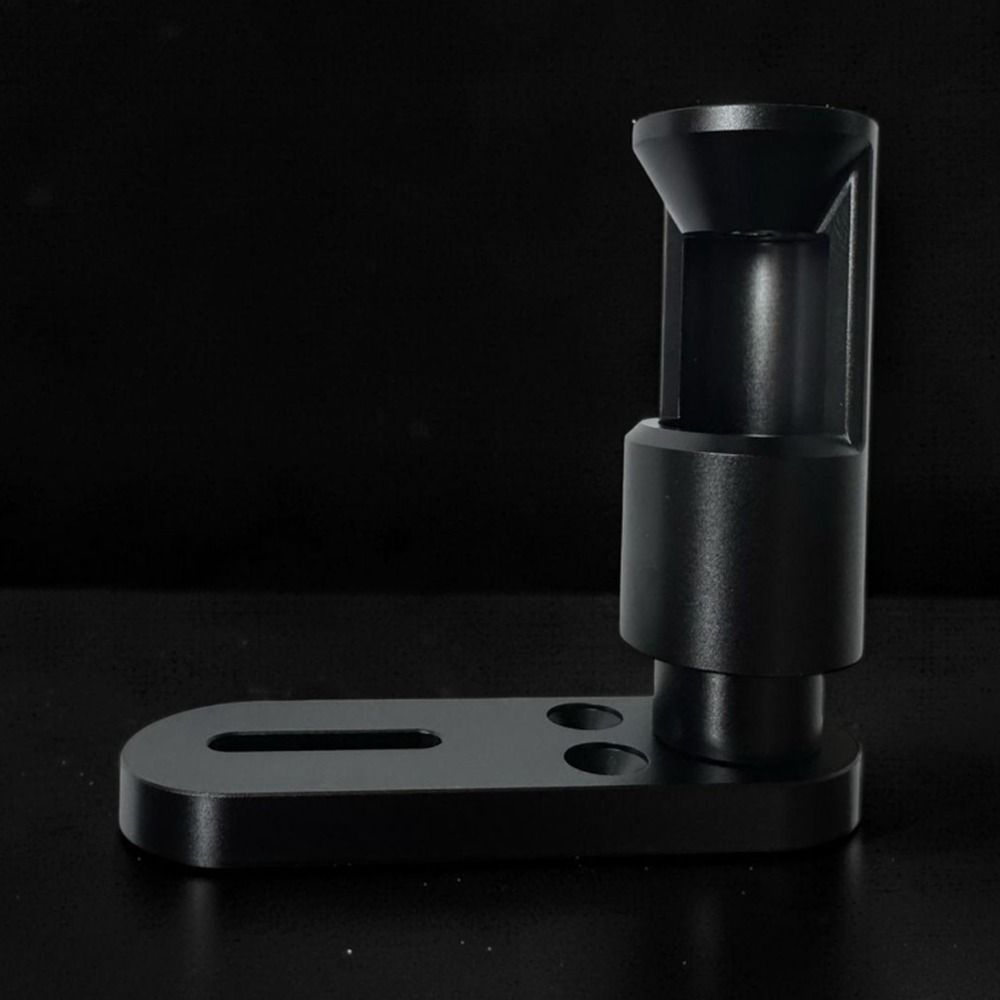
Make your own beading tools – with a round cup, not a cone. Beading tools wear out, and most sharpening methods leave a conical cup in the tip. A conical cup cannot form a round bead. On the JURA Micro Grinder, the Beading Tool Maker turns used 2.35 mm drills and burs into beading tools and holds them while you cut a round cup with a carbide bur. Round cup, round bead: the tool rolls the metal into a smooth, bright bead.
In the box
What is included
JURA Beading Tool Maker upgrade: Beading Tool Maker, mounting post, new bottom plate with threaded hole and two short bottom plate screws (16 mm)
SKU EQ.MG.BT
Good to know
An upgrade for your JURA Micro Grinder: the new bottom plate with threaded hole replaces the original bottom plate once
Ordered together with a JURA Micro Grinder? We fit the new bottom plate and align the Beading Tool Maker for you before it ships, as a dedicated service. Adding it to your own Micro Grinder: you replace the bottom plate yourself – follow the step-by-step upgrade instruction below
For drills and burs with a 2.35 mm (3/32") shank
You also need a micromotor, carbide burs for the cup and the JURA Diamond Wheels to shape the tip
Make the tool from old steel burs; cut the cup with carbide burs only
Prefer it on paper or offline? Download the full manual (PDF)
Ordered the Beading Tool Maker together with your Micro Grinder? Then we do chapters 1 – 2 for you: your Micro Grinder arrives with the upgrade fitted, ready to use. Go straight to chapter 3.
Ordered the Beading Tool Maker separately, for the Micro Grinder you already have? Then you carry out chapters 1 – 2 yourself – only once.
Keep this manual: chapters 1 – 2 are also the procedure if you ever need to replace the micromotor (4) in the future – spare motor: Jura Replacement Microgrind Grinding Motor (SKU EQ.MG.M.SP).
1. Parts overview
The numbers in the table are shown on the pictures and used in the steps.
Swipe sideways to see the full table
| No. | Part | What it is | In the upgrade |
|---|---|---|---|
| 1 | Bottom plate | 1A (black) and 1B (red) together, on top of the handle | |
| 1A | Bottom plate 1A (black) | Upgrade / replacement part: the new 1A with the larger threaded hole replaces the original 1A | Included |
| 1B | Bottom plate 1B (red) | Only for the red colour line, no other function | |
| 2 | Absolute Zero Table | Sets the zero height; the Locking Nut (lower part) fixes it | |
| 3 | Handle | The body the micromotor sits in | |
| 4 | Micromotor | The motor | |
| 5 | Lock lever | Locks the micromotor in the handle | |
| 6 | Handle screw | Fixes the micromotor in the handle | |
| 7 | Bottom plate screws | Hold the bottom plate on the handle, also used for aligning. Upgrade: 2 short screws (16 mm) | Included |
| 8 | Absolute Zero Table screw | Holds the Absolute Zero Table, sits between 1A and 1B (not visible) | |
| 9 | Beading Tool Maker mounting post | Screws into the thread of the new 1A | Included |
| 10 | Beading Tool Maker | Slides onto the mounting post (9), turns 360 degrees | Included |
Included in the Beading Tool Maker upgrade · SKU EQ.MG.BT
- Beading Tool Maker (10)
- Beading Tool Maker mounting post (9)
- New bottom plate 1A with threaded hole (1A)
- Two short bottom plate screws, 16 mm (7)
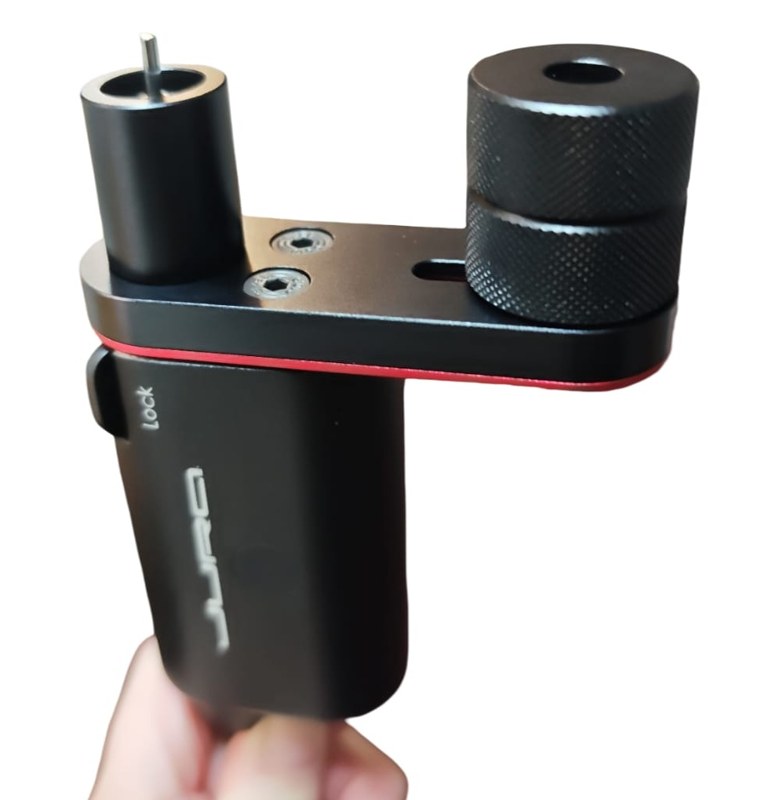 710211B53
With the Beading Tool Maker mounted.
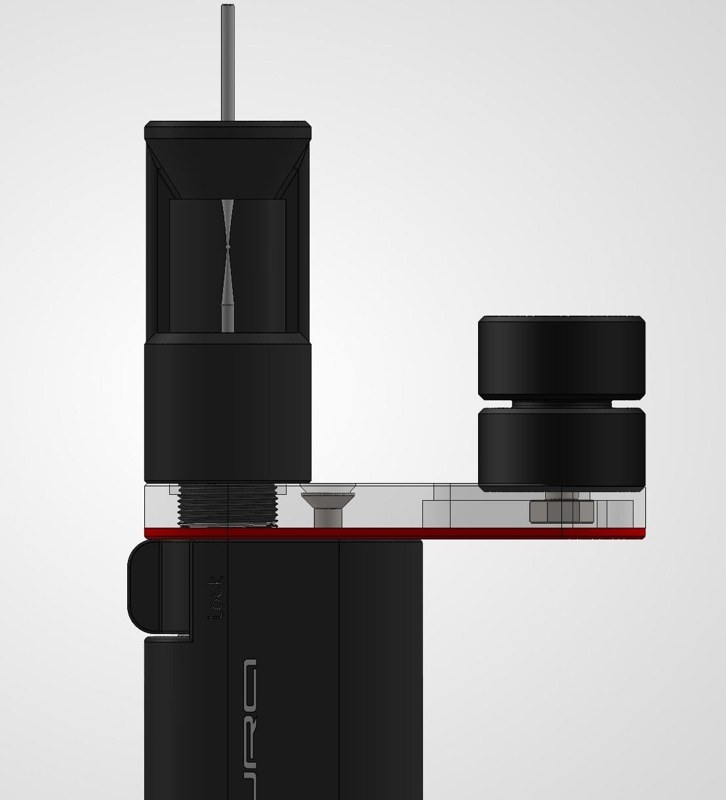 8791A1B25310Tips meet
Cross-section: the Absolute Zero Table screw (8) holds the Absolute Zero Table and sits between 1A and 1B. Above: correct alignment – the tips of the two burs meet.
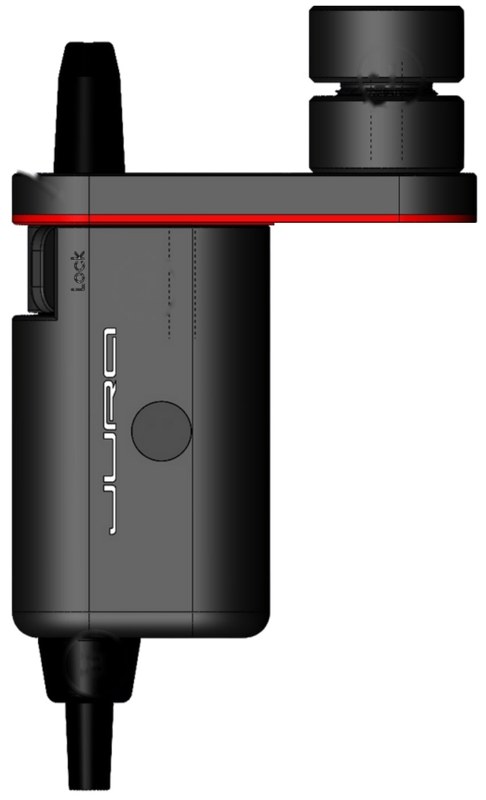 11B1A23456
Overview of the parts.
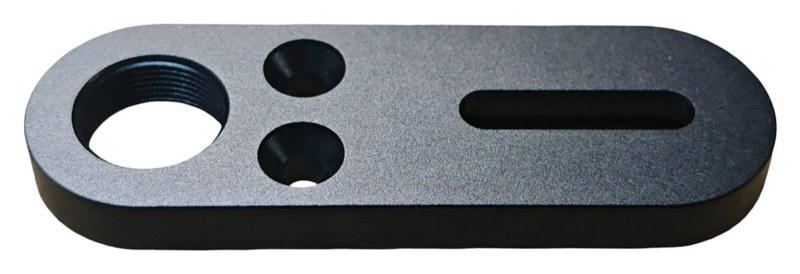 1A9
1A – new bottom plate 1A: larger hole with thread, where 9 (the Beading Tool Maker mounting post) screws in.
2. Step by step – changing bottom plate 1A
One-time upgrade. Follow the steps in this exact order. You need: 5 mm (5 mm Hex Key, SKU MH.01) and 3 mm hex keys, two tapered burs (or a ball bur) and your microscope. Before you start, make sure the lock lever (5) is in the locked position.
- Remove the screw cap and loosen the handle screw (6) with the 5 mm hex key. If the screw is tight, extra force may be required; a bench press can be used for this.
- Remove the two bottom plate screws (7) on top of the bottom plate (1) with the 3 mm hex key.
- Lift off the bottom plate (1) together with the Absolute Zero Table (2).
- Remove the Absolute Zero Table (2) by unscrewing the Absolute Zero Table screw (8). The Absolute Zero Table screw will drop between 1A and 1B.
- Separate the old bottom plate 1A (black, without thread) from bottom plate 1B (red). The old 1A is replaced by the new bottom plate 1A with the threaded hole, supplied with the Beading Tool Maker. Bottom plate 1B is reused.
- Important: first reinsert the Absolute Zero Table screw (8) between the plates. Then press the new bottom plate 1A firmly onto 1B. This is a permanent press fit and requires considerable force; a bench press can be used for this.
- Reattach the Absolute Zero Table (2) and tighten the Absolute Zero Table screw (8).
Warning – before reassembly (applies to steps 9, 10 and 11)
The micromotor (4) is now loose inside the handle (3). Before you tighten anything again, make sure that:
- the micromotor is in the locked position, and
- the lock lever (5) is correctly in place and in the locked position in the handle, aligned with the “Lock” marking.
The lock lever is tapered: the shallow side must face the shallow side of the micromotor, i.e. upward.
If the micromotor or the lock lever is not fully locked, the micromotor will not open and close correctly during use, and the chuck of the micromotor will be damaged.
- Place the bottom plate (1) back on the handle. Replace the two long bottom plate screws (20 mm) with the two short bottom plate screws (16 mm) supplied with the set.
- Push the micromotor fully into the handle and turn it clockwise until the lock lever is in the locked position. Check that both the micromotor and the lock lever (5) are fully locked – see the warning above.
- Only when the micromotor and the lock lever (5) are both fully locked: tighten the handle screw (6) with the 5 mm hex key until the micromotor is firmly secured – see the warning above.
- Check: unlock and lock the micromotor a few times using the lock lever (5) to make sure the lock operates smoothly and correctly. If not, loosen the handle screw (6) and repeat steps 9 and 10 – see the warning above. Once the lock works correctly, refit the screw cap over the handle screw (6); a small drop of any standard adhesive holds it securely in place.
- Screw the Beading Tool Maker mounting post (9) into the new bottom plate 1A.
- Slide the Beading Tool Maker (10) onto the mounting post (9). It is not fixed and can be turned through 360 degrees.
- Alignment: insert one tapered bur into the micromotor and one through the Beading Tool Maker (a ball bur can also be used). Check under the microscope: the burs are aligned when their tips meet exactly.
- If the burs are not aligned, loosen the two bottom plate screws (7), move the Beading Tool Maker in the required direction and retighten. Repeat until the burs are aligned. Turning the Beading Tool Maker on the mounting post can also help to achieve the alignment.
The whole idea of the system: you use the burs you already have. Your old steel drills and burs become beading tools, and your carbide ball burs cut the round cup – that is all you need. Making a beading tool from scratch takes no time at all, so you no longer need to buy expensive ready-made beading tools. You make the size you need yourself – for round, bright beads.
One tapered blank – every size you needNo more stock of ready-made beading tools in every size. With one tapered blank – an old bur from your bench or a JURA Beading Tool Blank – you have exactly the diameter you need, in seconds.
The whole system is made to work efficiently under your microscope, so you are always in control and see every detail.
Made for 2.35 mm shanks
The Beading Tool Maker is made for beading tools with a 2.35 mm (3/32") shank. That is the standard shank of ball burs and drills, so the old burs and drills from your bench fit straight in. We use Komet ball burs and drills. You find them in our shop under Drills & Burs at juratools.com.
Coming soonJURA Beading Tool Blanks (SKU SG.BT.BL): pre-shaped blanks with the tapered shape already made. They save you step 2 – you go straight to choosing your ball bur and shortening the tip.
What you need
- An old steel drill or bur with a 2.35 mm shank
- The green grinding wheel and the blue Diamond Wheel, to shape the blank
- The yellow Diamond Wheel, to polish – preferably an old, worn one
- A carbide ball bur in the size of the bead you want
- Your JURA Micro Grinder (SKU EQ.MG) with the Beading Tool Maker (SKU EQ.MG.BT), and your microscope
Good to know: the green, blue and yellow wheels are included with your JURA Micro Grinder – if you have the Micro Grinder, you already have them. Spare wheels: JURA Diamond Wheels – yellow (SKU PL.DW.F), blue (SKU PL.DW.M), green (SKU PL.DW.R) and the Diamond Cutting Wheel (SKU PL.CW).
Spare your diamond wheelsYour beading tools are made of steel. Wherever you can, spare your diamond wheels and use a hard abrasive wheel instead – for example to remove burrs or sharp edges. There are various types available. Every situation is different – you learn to judge which wheel the job needs.
Step by step
1
Remove the dull tip
Cut off the worn or dull part of the old drill or bur.
2
Shape the taper
Grind the tip into a tapered point, as shown in the picture of the beading tool blank. How much you need depends on how much metal there is to remove. Usually it is only a little, and the blue Diamond Wheel is enough – especially when you only correct the shape. If there is more to remove, start with the green grinding wheel and finish with the blue Diamond Wheel.
Tip from the bench – even faster with contra-rotationPut the grinding wheel in the micromotor of your Micro Grinder, and the blank in a second micromotor, for example the one on your JURA machine. Let them turn in opposite directions – one turns one way, the other the other way – and you shape the taper in no time.
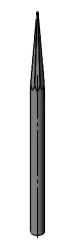
The tapered beading tool blank.
3
Choose the ball bur
Pick the carbide ball bur for the bead you want. Its size depends on the prong size you want to achieve. Find them in our shop: Komet Carbide Round Ball Burs (SKU DB.H71).
Good to knowThe ball bur size is an approximate guide. Try it out at your bench to see what you really need for your prongs. This instruction is a general explanation – practice shows you the right sizes and depth for your own work.
4
Shorten the tip to fit the ball bur
With the Diamond Cutting Wheel, shorten the tapered tip until its diameter fits your ball bur. The higher you shorten on the taper, the smaller the diameter; the lower, the larger.
Shorten the taper with the Diamond Cutting Wheel where its diameter fits your ball bur.
5
Mount the blank and the Beading Tool Maker
Put the beading tool blank in the micromotor of the Micro Grinder. Then slide the Beading Tool Maker (10) over the mounting post (9).
6
Insert the ball bur
Insert the carbide ball bur from the top, through the Beading Tool Maker. You hold it by hand – it does not go in a handpiece.
7
Check the alignment
Switch on the micromotor at about 8,000 rpm – the blank now spins. Under the microscope, check that the ball bur and the tip of the blank are perfectly aligned.
8
Cut the round cup
Hold the shank of the ball bur between your fingers and gently move it up and down onto the spinning tip, until the round cup is cut.
Tip – a better gripHolding the thin shank can be uncomfortable, and it can get warm. Cover it with anything that gives you a better grip – a short piece of silicone tubing, or even a bit of thermoplastic will do. Be creative.
Not too deep – about 30 %
Cut the cup only about 30 % of the ball bur deep. Too deep and the beading tool catches the metal: it will not spread and turn the bead round.
Detail of the tip: round cup, about 30 % of the ball deep, with a sharp edge after cutting.
After cutting, the edge around the cup is sharp – that is correct.
9
Polish the cup
Polish the inside of the cup with the yellow Diamond Wheel. While the beading tool is spinning, gently press its tip into the yellow wheel – for a bright, shiny cup and beautiful beads on your prongs.
Spare your toolsUse an old yellow wheel for this, or press into the side or the bottom of the wheel, so you do not wear out the front of a new one.
The result: how your prongs should look
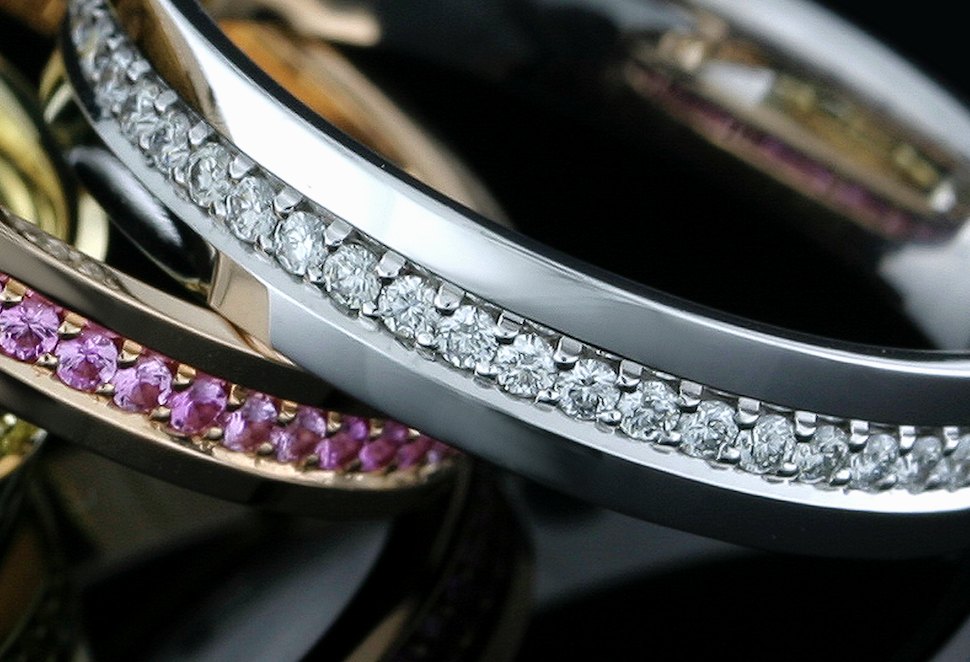
What makes a correct prong:
- Equal – all prongs have the same size and shape
- Shining – bright, straight from the polished cup
- Round – a beautifully rounded bead
- Clean – no burrs on the sides
Burrs or a mushroom effect?
Then the wrong technique was used, or the beading tool was not made correctly. Once burrs or a mushroom shape are there, you can never correct them – that is why a good beading tool matters so much.
Keep your beading tool in shape
While you work, the tip wears or can bend a little. Then correct it from the sides: on the blue Diamond Wheel when there is more to correct, on the yellow Diamond Wheel when it only needs a touch. How much depends on the damage.
Tip from the bench – the Hand Chuck with Stub HeadWhen you bead, you repeat the same movement from one bead to the next. Each time the tip touches the stone – especially a diamond – it wears on one side. Put your hand chuck down and pick it up again, and you will never hold it in exactly the same position. Work on in a different position, and the worn side scratches your prongs. The Stub Head gives you a clear reference point, so you always pick up your beading tool in the same position. That is why we made it. Find the Stub Head in our JURA Hand Chucks (SKU MH.08.SET).
A word from Jura
The Beading Tool Maker was not born on a drawing board – it was born at the bench. In decades of setting, I saw the same struggle again and again, with professionals and students alike: searching for a beading tool that gives a truly round, bright bead, and losing time and money on ready-made tools that never quite fit the job.
So I made a simple way to make the right beading tool yourself, in exactly the size you need, in no time. I hope it makes your work easier – and brings you joy at the bench.
Join us on a journey toward true excellence.


Make the most of your tools
Learn to reach this perfection in every bead in our JURA diamond setting courses.
Video instructions are coming soon – sign up for the newsletter at juratools.com.
At the bench
Key features
Round cup
The cup in the tip comes out round, so the bead comes out round and bright.
Second life for old burs
Used 2.35 mm drills and burs become beading tools instead of scrap.
Your own sizes
You make the tip size you need, when you need it.
Take it to the next level
Start with the JURA Micro Grinder
The Beading Tool Maker works on the JURA Micro Grinder. For the final clean-up of your beading tool, use the yellow (fine) JURA Diamond Wheel.
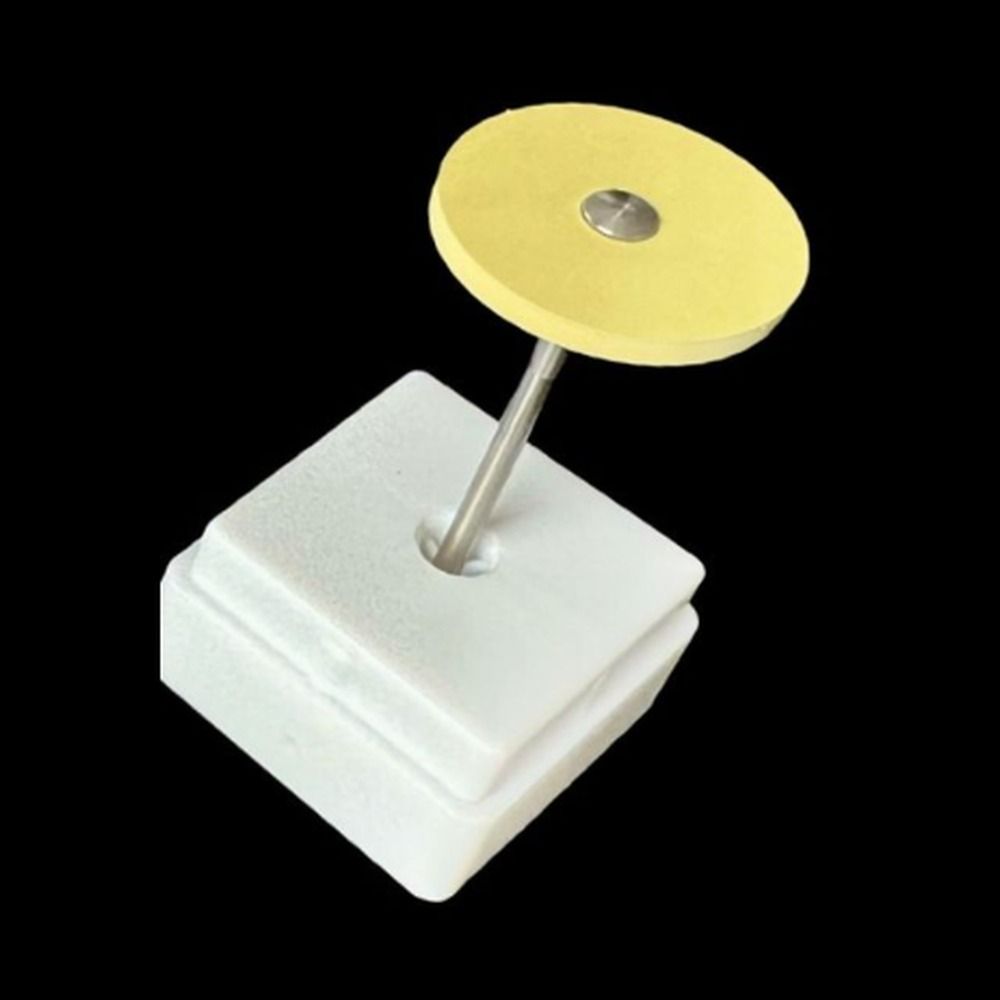
CombiDeal · PL.DW.F
Final clean-up of your beading tool
Order it together with your Beading Tool Maker: tick it under Choose CombiDeal, right above Add to Bag.
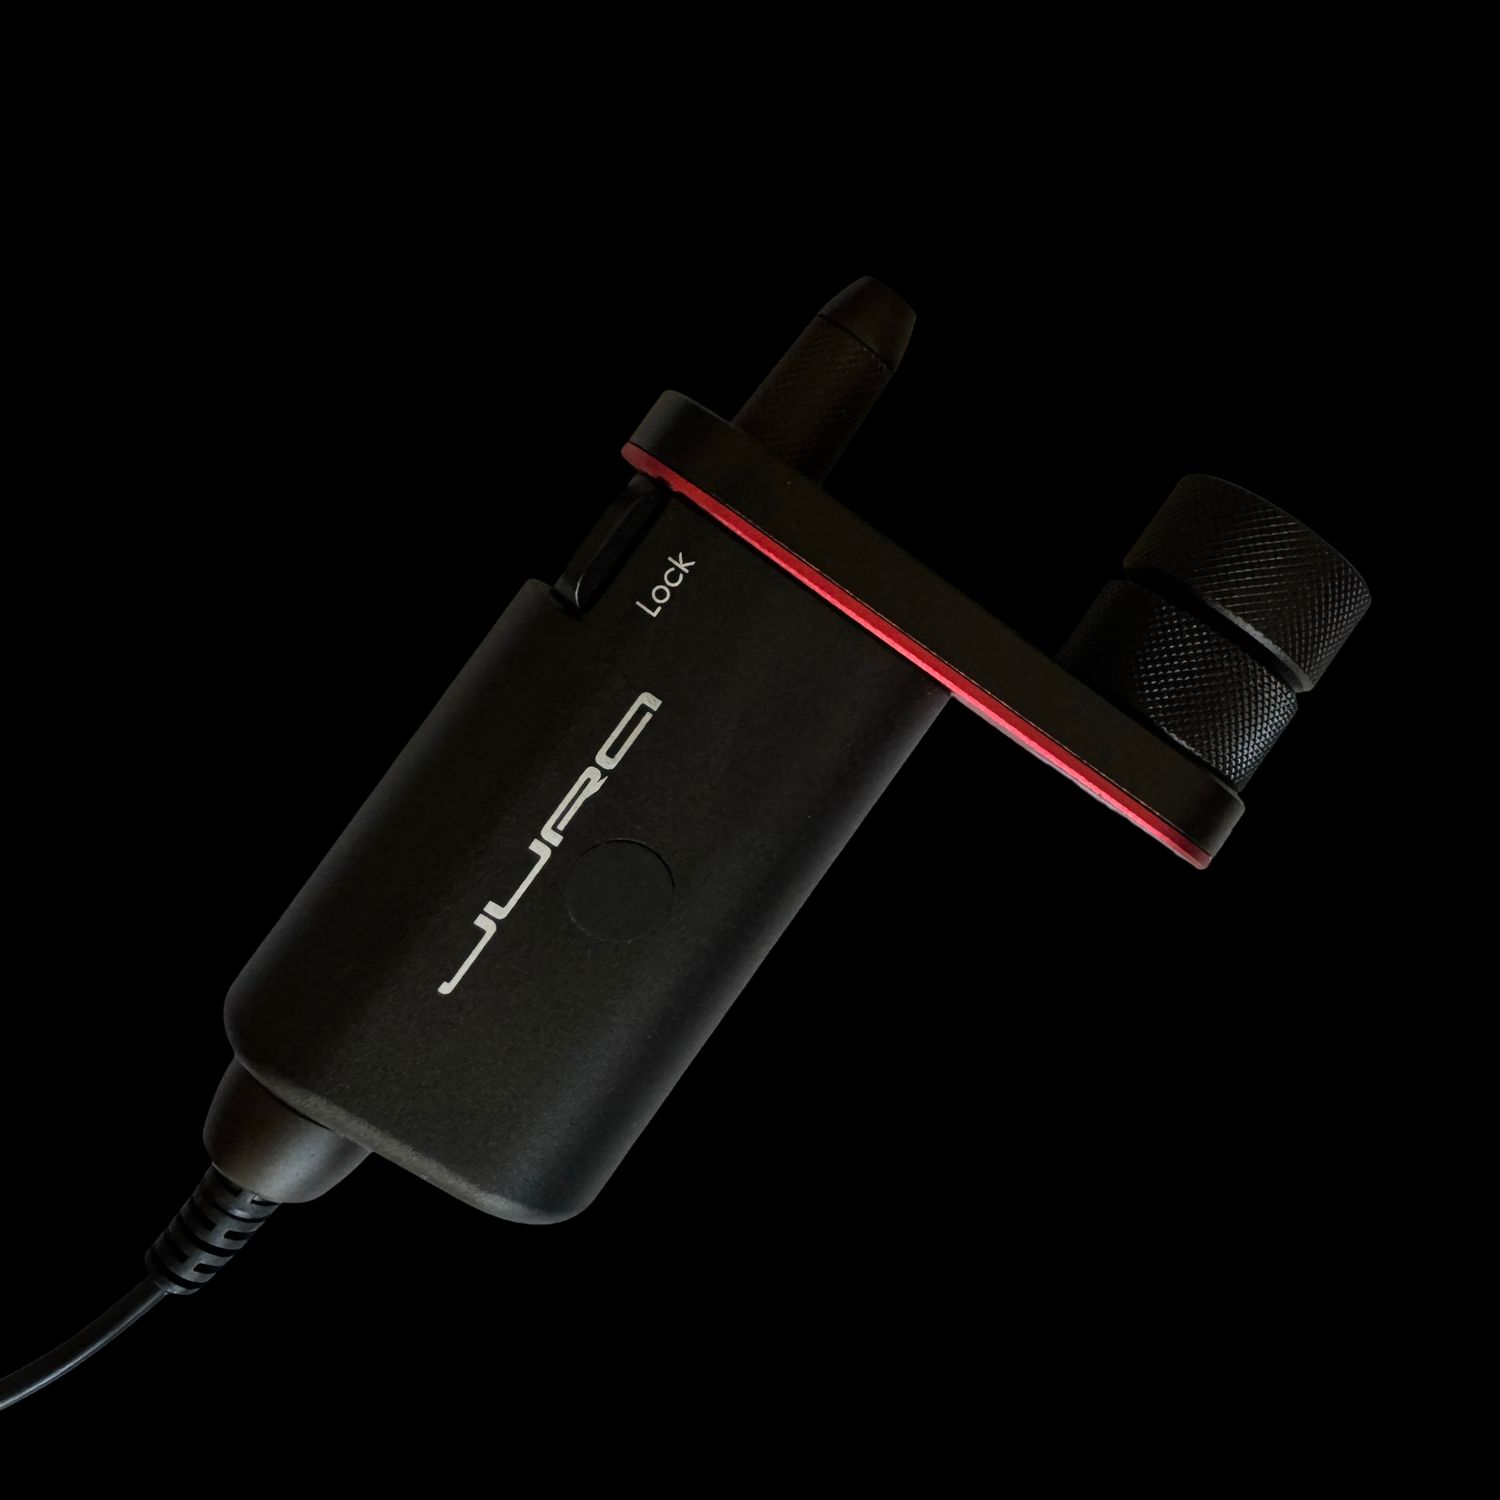
EQ.MG
The sharpening system
Sharpens carbide gravers with angle templates; the base for the Beading Tool Maker.
EQ.MG.PH
Also for your Micro Grinder
A parallel heel for any Graver face angle. Mounts on the Absolute Zero table.
Explore more
Personal advice
Not sure what you need for sharpening? Tell us what you set or engrave, and we will advise you.
Photos are an indication: we keep developing our products, so details may differ slightly.
All prices exclude VAT. Final VAT and shipping are applied at checkout based on your region and VAT registration status.
Display prices in:EUR
